
Getting Started
Required Blocks
Support
Escrow's Single Release Lifecycle#
Step by Step Guide to implement Escrow's Single Release Lifecycle
It does not work for a real use case, only for testing purposes. But if you want to implement it, you can use the code below as a reference and customize it to your needs.
Create a Next.js Project#
Start by creating a new Next.js project with TypeScript and Tailwind CSS. In order to make easier the setup, please use the path alias with "@/":
1npx create-next-app@latestNavigate to your project directory:
1cd my-trustless-appInstall Trustless Work Blocks#
Install the main library package:
1npm install @trustless-work/blocksRun the CLI Setup
Initialize your project with the Trustless Work CLI:
1npx trustless-work init- Runs
shadcn init(base configuration) - Installs the
sonnershadcn component (toast notifications) - Copies the
helpersblock (base utilities) - Creates
.twblocks.jsonconfiguration file
Create a .env file in your project root:
1# Required: Your Trustless Work API key
2NEXT_PUBLIC_API_KEY=your_api_key_here
Add Wallet Connectivity
Add wallet connectivity to your app:
1npx trustless-work add wallet-kitThe CLI automatically installs the WalletProvider and the required npm dependencies when you run this command.
Wrap your app with the WalletProvider:
Wrap your app with the WalletProvider in your layout.tsx:
1return (
2    <WalletProvider>{children}</WalletProvider>
3);
4
Example usage in a page:
Add wallet connectivity to your app:
1"use client";
2
3import { WalletButton } from "@/components/tw-blocks/wallet-kit/WalletButtons";
4
5export default function Home() {
6  return (
7    <div className="font-sans grid grid-rows-[20px_1fr_20px] items-center justify-items-center min-h-screen p-8 pb-20 gap-16 sm:p-20">
8      <header className="flex justify-between items-center w-full">
9        <h2 className="text-2xl font-bold">Trustless Work</h2>
10
11        {/* Wallet Button */}
12        <WalletButton />
13      </header>
14    </div>
15  );
16}
17When you add an escrow block, the CLI automatically installs the required peer dependencies (helpers, handle-errors, wallet-kit, tanstack, and the necessary providers). You no longer need to add them separately.
Add Single Release Escrows Components
Add Single Release Escrows to your app:
1npx trustless-work add escrows/single-releaseAdd Single-Multi Release Escrows Components
Add Single-Multi Release Escrows to your app:
1npx trustless-work add escrows/single-multi-releaseAdd Escrows by Role Cards
Add Escrows by Role Cards to your app:
1npx trustless-work add escrows/escrows-by-role/cardsImport Actions
In the code, there are some actions commented out. You can uncomment them and import them from the single-release block. See the notes in the escrows by role or by signer components.
Commented Out Code
1return (
2    <div className="flex items-start justify-start flex-col gap-2 w-full">
3      {/* You can add the buttons here, using the buttons from the blocks. These actions are conditional based on the escrow flags and the user roles. */}
4      {hasConditionalButtons && (
5        <div className="flex flex-col gap-2 w-full">
6          {/* UpdateEscrowDialog component should be rendered based on the escrow type. It means that if the selectedEscrow.type is "single-release", then the UpdateEscrowDialog (from the single-release block) component should be rendered. If the selectedEscrow.type is "multi-release", then the UpdateEscrowDialog (from the multi-release block) component should be rendered. */}
7          {/* {shouldShowEditButton && <UpdateEscrowDialog />} */}
8
9          {/* Works only with single-release escrows */}
10          {/* Only appears if the escrow has balance */}
11          {/* {shouldShowDisputeButton && <DisputeEscrowButton />} */}
12
13          {/* Works only with single-release escrows */}
14          {/* Only appears if the escrow is disputed */}
15          {/* {shouldShowResolveButton && <ResolveDisputeDialog />} */}
16
17          {/* Works only with single-release escrows */}
18          {/* Only appears if all the milestones are approved */}
19          {/* {shouldShowReleaseFundsButton && <ReleaseEscrowButton />} */}
20
21          {/* Multi-release: Withdraw Remaining Funds */}
22          {/* {shouldShowWithdrawRemaining && <WithdrawRemainingFundsDialog />} */}
23        </div>
24      )}
25
26      {/* FundEscrow */}
27      {/* <FundEscrowDialog /> */}
28    </div>
29  );
Actions Imported
1// If you need both types, you should import both versions to update escrow
2import { UpdateEscrowDialog } from "../../single-release/update-escrow/dialog/UpdateEscrow";
3/* import { UpdateEscrowDialog as UpdateEscrowDialogMultiRelease } from "../../multi-release/update-escrow/dialog/UpdateEscrow"; */
4import { FundEscrowDialog } from "../../single-multi-release/fund-escrow/dialog/FundEscrow";
5import { DisputeEscrowButton } from "../../single-release/dispute-escrow/button/DisputeEscrow";
6import { ResolveDisputeDialog } from "../../single-release/resolve-dispute/dialog/ResolveDispute";
7import { ReleaseEscrowButton } from "../../single-release/release-escrow/button/ReleaseEscrow";
8import { WithdrawRemainingFundsDialog } from "../../multi-release/withdraw-remaining-funds/dialog/WithdrawRemainingFunds";
9
10return (
11    <div className="flex items-start justify-start flex-col gap-2 w-full">
12      {/* You can add the buttons here, using the buttons from the blocks. These actions are conditional based on the escrow flags and the user roles. */}
13      {hasConditionalButtons && (
14        <div className="flex flex-col gap-2 w-full">
15          {/* UpdateEscrowDialog component should be rendered based on the escrow type. It means that if the selectedEscrow.type is "single-release", then the UpdateEscrowDialog (from the single-release block) component should be rendered. If the selectedEscrow.type is "multi-release", then the UpdateEscrowDialog (from the multi-release block) component should be rendered. */}
16          {shouldShowEditButton && <UpdateEscrowDialog />}
17
18          {/* Works only with single-release escrows */}
19          {shouldShowDisputeButton && <DisputeEscrowButton />}
20
21          {/* Works only with single-release escrows */}
22          {shouldShowResolveButton && <ResolveDisputeDialog />}
23
24          {/* Works only with single-release escrows */}
25          {shouldShowReleaseFundsButton && <ReleaseEscrowButton />}
26
27          {/* Multi-release: Withdraw Remaining Funds */}
28          {shouldShowWithdrawRemaining && <WithdrawRemainingFundsDialog />}
29        </div>
30      )}
31
32      <FundEscrowDialog />
33    </div>
34  );
Manual Provider Setup
Wrap your app with the required providers in this specific order:
1import type { Metadata } from "next";
2import { Geist, Geist_Mono } from "next/font/google";
3import "./globals.css";
4import { ReactQueryClientProvider } from "@/components/tw-blocks/providers/ReactQueryClientProvider";
5import { TrustlessWorkProvider } from "@/components/tw-blocks/providers/TrustlessWork";
6import { WalletProvider } from "@/components/tw-blocks/providers/WalletProvider";
7import { EscrowProvider } from "@/components/tw-blocks/providers/EscrowProvider";
8import { EscrowDialogsProvider } from "@/components/tw-blocks/providers/EscrowDialogsProvider";
9import { EscrowAmountProvider } from "@/components/tw-blocks/providers/EscrowAmountProvider";
10import { Toaster } from "@/components/ui/sonner";
11
12const geistSans = Geist({
13  variable: "--font-geist-sans",
14  subsets: ["latin"],
15});
16
17const geistMono = Geist_Mono({
18  variable: "--font-geist-mono",
19  subsets: ["latin"],
20});
21
22export const metadata: Metadata = {
23  title: "Create Next App",
24  description: "Generated by create next app",
25};
26
27export default function RootLayout({
28  children,
29}: Readonly<{
30  children: React.ReactNode;
31}>) {
32  return (
33    <html lang="en">
34      <body
35        // optional: use geistSans.variable and geistMono.variable
36        className="antialiased"
37      >
38        <ReactQueryClientProvider>
39          <TrustlessWorkProvider>
40            <WalletProvider>
41              <EscrowProvider>
42                <EscrowDialogsProvider>
43                  <EscrowAmountProvider>
44                    {children}
45
46                    <Toaster />
47                  </EscrowAmountProvider>
48                </EscrowDialogsProvider>
49              </EscrowProvider>
50            </WalletProvider>
51          </TrustlessWorkProvider>
52        </ReactQueryClientProvider>
53      </body>
54    </html>
55  );
56}
57Example usage in a page:
Now, you are able to interact with the entire escrow lifecycle.
1"use client";
2
3import { EscrowsByRoleCards } from "@/components/tw-blocks/escrows/escrows-by-role/cards/EscrowsCards";
4import { InitializeEscrowDialog } from "@/components/tw-blocks/escrows/single-release/initialize-escrow/dialog/InitializeEscrow";
5import { WalletButton } from "@/components/tw-blocks/wallet-kit/WalletButtons";
6
7export default function Home() {
8  return (
9    <div className="font-sans grid grid-rows-[20px_1fr_20px] items-center justify-items-center min-h-screen p-8 pb-20 gap-16 sm:p-20">
10      <header className="flex justify-between items-center w-full">
11        <h2 className="text-2xl font-bold">Trustless Work</h2>
12        <WalletButton />
13      </header>
14      <main className="flex flex-col gap-[32px] row-start-2 items-center sm:items-start">
15        <div className="container">
16          <div className="flex w-full mb-4 justify-end">
17            <div className="flex w-1/6">
18              <InitializeEscrowDialog />
19            </div>
20          </div>
21
22          <EscrowsByRoleCards />
23        </div>
24      </main>
25    </div>
26  );
27}
28
29Final UI
By using these components, you'll be able to completed the entire escrow lifecycle.
- Before you start using the UI, you must add the USDC asset to your wallet. If not, you wont be able to interact with Trustless Work.
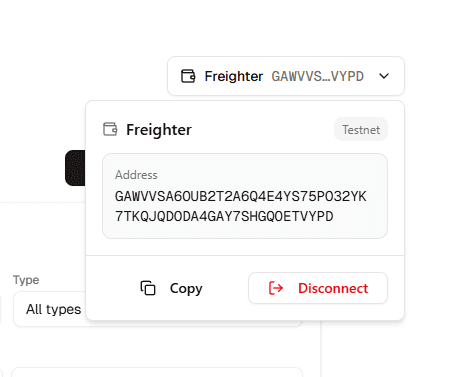
Wallet Connection Dialog
Show the wallet connection dialog:
Cards by Role
Show the cards by role:

Initialize Escrow Dialog
Show the initialize escrow dialog:

Escrow Details Dialog
Show the escrow details dialog:

The easiest way to implement escrows in blockchain."